# Deploy a Connector in Merchant Center
Now that you are familiar with the basics of Connectors and Connect applications, let’s see this in action by deploying a public, certified Connector to your Project.
While Connect handles the infrastructure provisioning and runtime environments, to deploy a Connector you will need certain configuration information such as a Composable Commerce API Client's client ID and secret. Connectors that use third-party services may also require some settings, such as or API keys, from that service. The deployment process includes the following steps:
1. Search for a Connector.
2. Install the Connector (create a Deployment) with the correct configurations.
3. Test the Connector in your project.
```mermaid
sequenceDiagram
participant C as Client (commercetools Project)
participant CC as Connect
participant CI as Connect managed Infrastructure
Running Connect applications
participant E as Third-party Services (CDM, PSP, PIM etc)
C->>CC: Search for a Connector
by creator, type and/or keywords
CC->>C: List of Connectors
C->>CC: Install Connector (request) + configurations
activate CC
CC->>CI: Deploy Connector
CC->>C: Create required resources
(such as Subscriptions, API Extensions, and Custom Fields)
Note over C,CC: links a commercetools Project to Connect apps
deactivate CC
C->>CI: Changes
Note over C,CI: updates in the project trigger API Extensions
updates/messages notify Subscriptions
activate CI
CI->>E: Call third-party services
activate E
E->>CI: Response
deactivate E
CI->>C: Response + Update actions
deactivate CI
```
The diagram above shows an important feature of Connect: Connectors are hosted by commercetools. A Connector is, technically, a container for running your code. Given our long history in providing stable, robust, reliable, and fast SaaS applications, you can trust commercetools to run your extensions and remove the need to worry about the hosting infrastructure!
## Step 1: Search for a Connector
To assist you in this, Connect provides a search option that can narrow down your search on certain keywords, names, or creators to find the Connector that is most suited to your business needs.
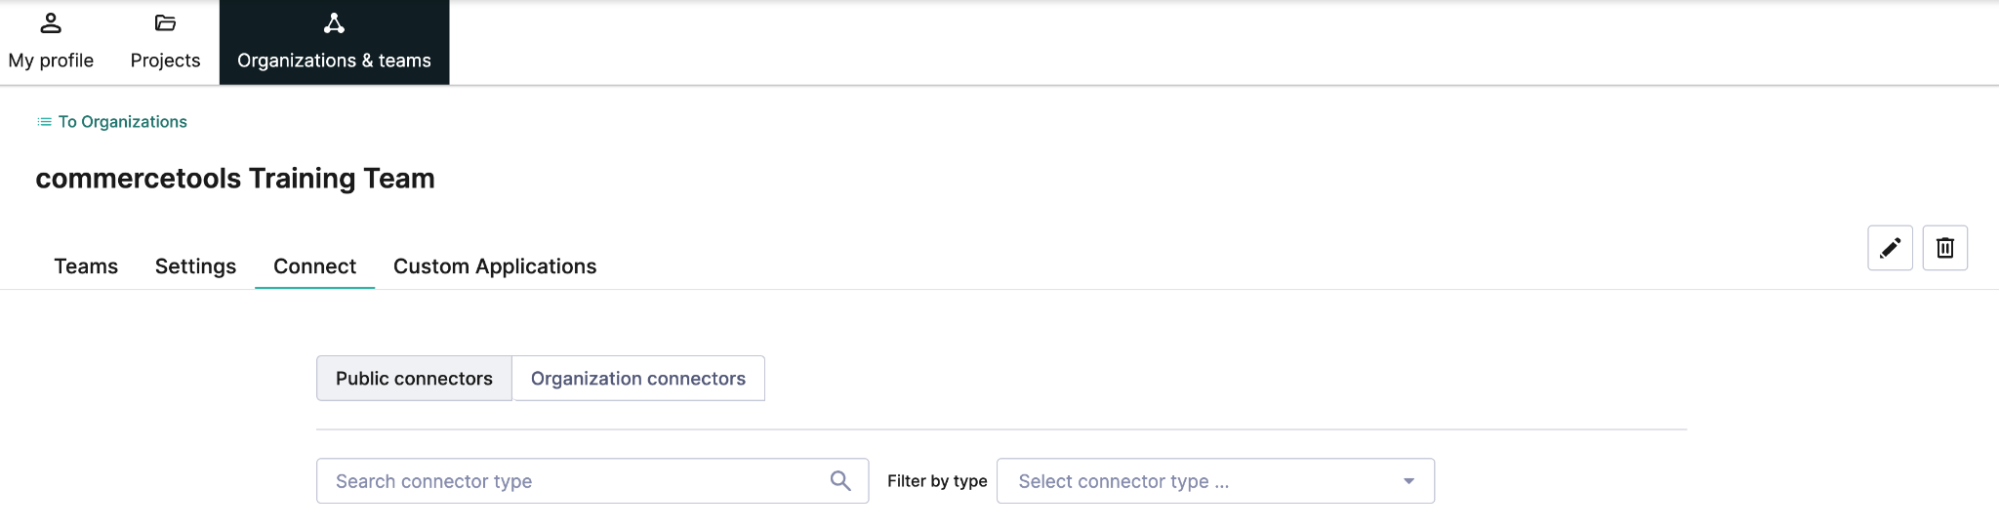
Let’s search for a freely available, public, training Connector, for which we can also find the [source code on Github](https://github.com/commercetools/self-learning-training-connector). You can explore the source code to understand this sample Connector in more detail. For now, you must read through the [README](https://github.com/commercetools/self-learning-training-connector/blob/main/README.md) and gather the information you need to install this Connector in your project. Navigate to the Merchant Center and perform the following steps:
1. Click your profile icon in the top right of the screen and select **Manage organizations & teams**.
2. Select an Organization and click the **Connect** tab.
3. Use the keywords `sample` and `training` to find the Connector developed by [training@commercetools.com](mailto:training@commercetools.com). You are searching for a Connector called `Self Learning Training Connector`.
Now, let’s install the Connector (or in other words, create a deployment).
## Step 2: Install the Connector
Let’s follow along with the tutorial from the [docs](/merchant-center/connect.md#install-a-public-connector) to continue and install the Connector found in the previous step.
1. Before starting the installation process, select **Learn more** and read the Connector's documentation, including the prerequisites and installation guide.
2. Click **Install** and select the **Region** in which you want to install the Connector.
3. Choose to install the Connector for a specific Project, select your project, and click **Next**.
4. Enter the values for all fields for each application within the Connector. These fields are specific for each Connector, and more information can be found in the Connector's documentation.
5. Click **Install**. The Manage connectors page appears, which displays the installation status.
6. The status will show `Installing` for some time before it changes to `Installed` or `Failed`.
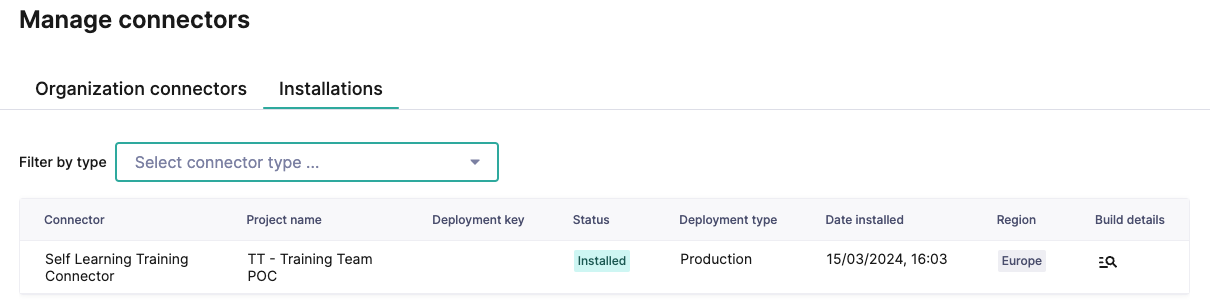
Select the Connector from the list to change its configuration,
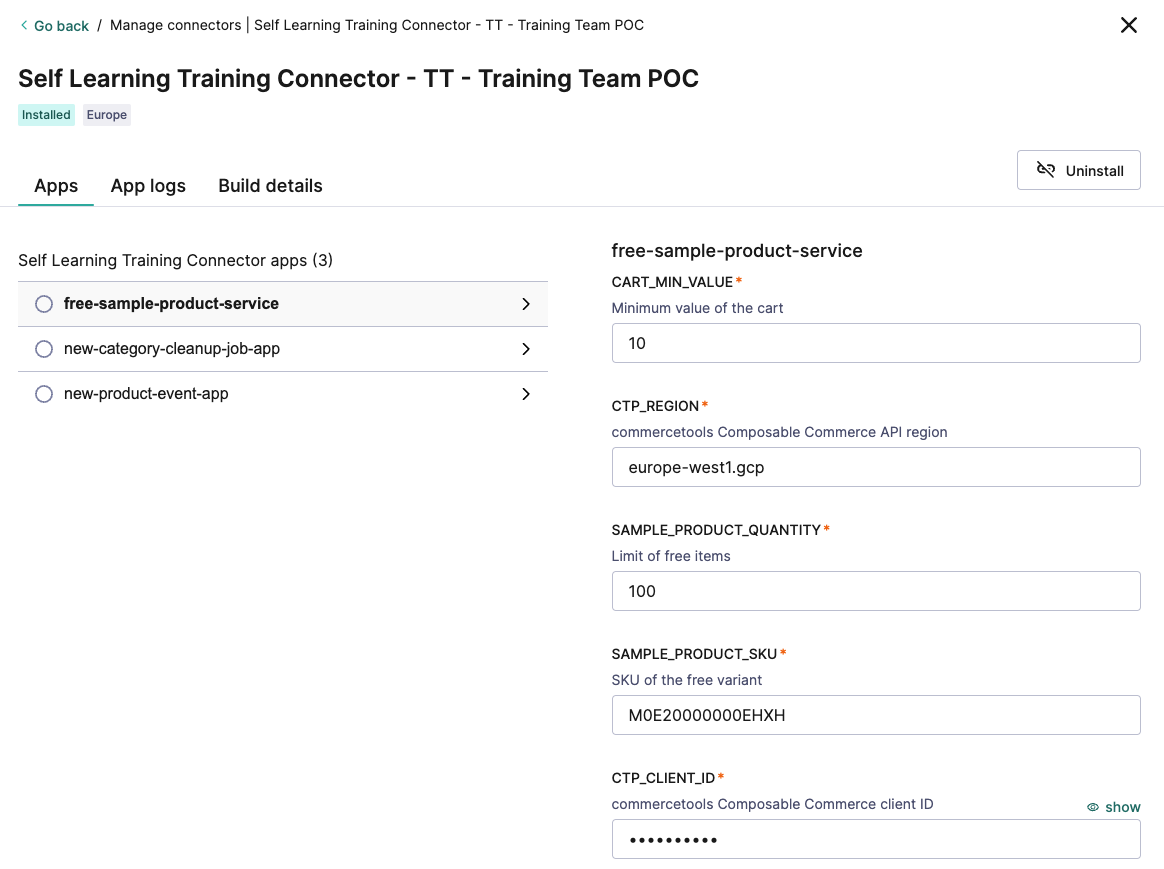
or view app logs and build details.
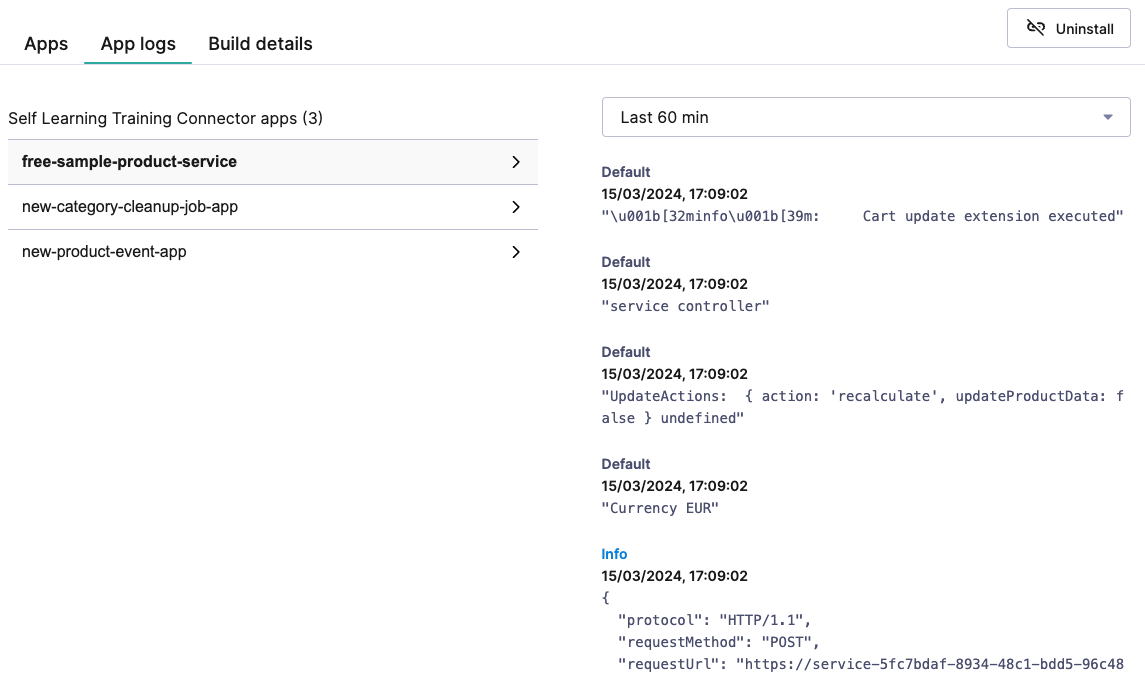
Voila! The Connector has been successfully installed. It’s time to test the Connector functionality in your project.
## Step 3: Test the Connector
### Test the service app
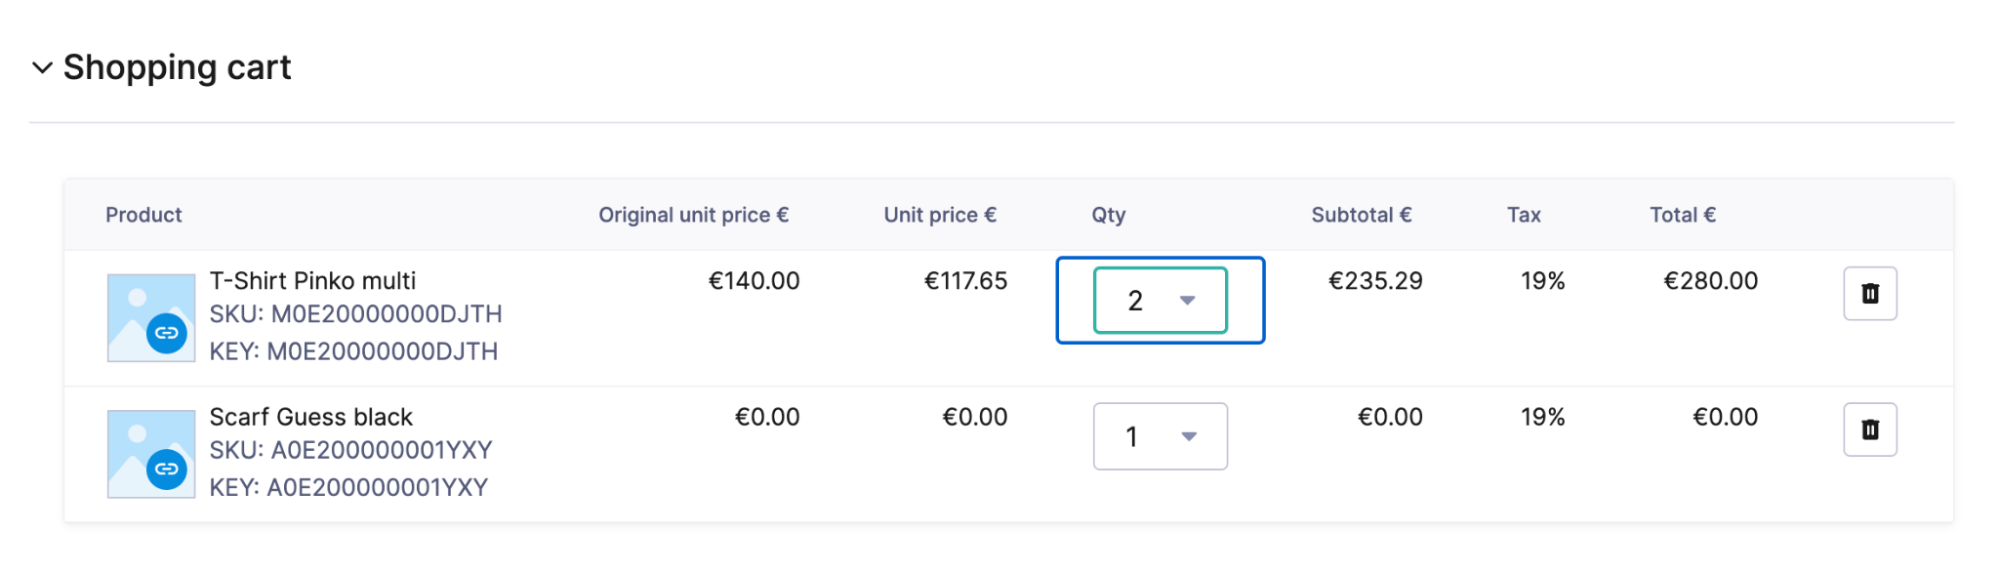
We can test the sample distributor app by creating a Cart and adding items that will change the total Cart value to more than the configured amount.
1. In the Merchant Center main menu, go to **Orders > Add order**.
2. Select a **Currency** from the drop-down box and click **Next**.
3. Select a Customer from the list and click **Next**.
4. Search for an item by its SKU and click **Add** to add the item to the cart. If the Cart Total is more than the configured value, you will see the free sample item added to the Cart.
### Test the event app
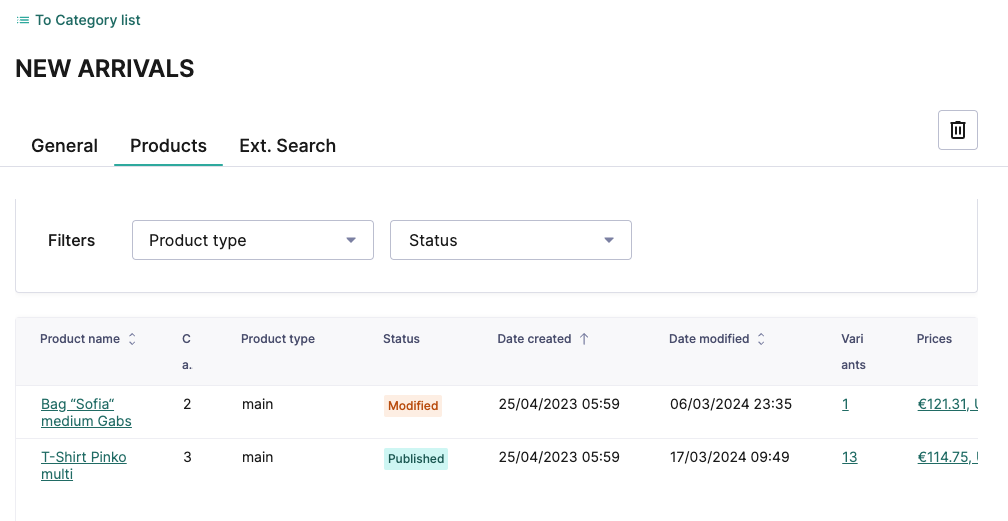
We can test the event new arrivals category management app by creating a new product.
1. In the Merchant Center main menu, go to **Products > Add product**.
2. Fill in all the details and Publish the Product.
3. That should notify the Event app to add the Product to the Category you configured as your `New` category in the Connector.
### Test the job app
We can test the job new arrivals category clean-up management app by manually adding a product that was created more than 30 days ago.
1. In the Merchant Center main menu, go to **Products** and then select a Product.
2. Click **Add categories** to add the product to the New Arrivals category.
3. Now, wait for the clean-up job to run. Currently, it’s configured to run daily at 1 AM.
4. Your product will be removed by the clean-up job.
## Test your knowledge
Fantastic work! Head on over to the next Connect module to dive deeper into the development process of a custom Connector:
Learn how to develop and deploy a Connector using the Connect API.
## Related pages
- [Area overview page with navigation](/certifications.md)
- [Previous page: Simplify commerce integrations](/certifications/deploy-marketplace-connector/simplify-ecommerce-integrations.md)
- [Search documentation and API specs](/search.md)