The Store Launchpad for B2B Manufacturing provides Business Units with a flexible process for approving Orders.
The approval process consists of two parts:
- Approval Flows: the overall process that lets you approve or reject an Order request.
- Approval Rules: the conditions that determine whether an Order needs approval. When a new order matches an Approval Rule, the related Approval Flow is triggered. Only one Approval Rule can apply per Order, but you can add multiple conditions and approvers to a single rule.
Approval Rules
You can access Approval Rules only on desktop devices.
Approval Rules use Order Predicates to define the conditions for when an Order triggers an Approval Flow. By default, the launchpad offers
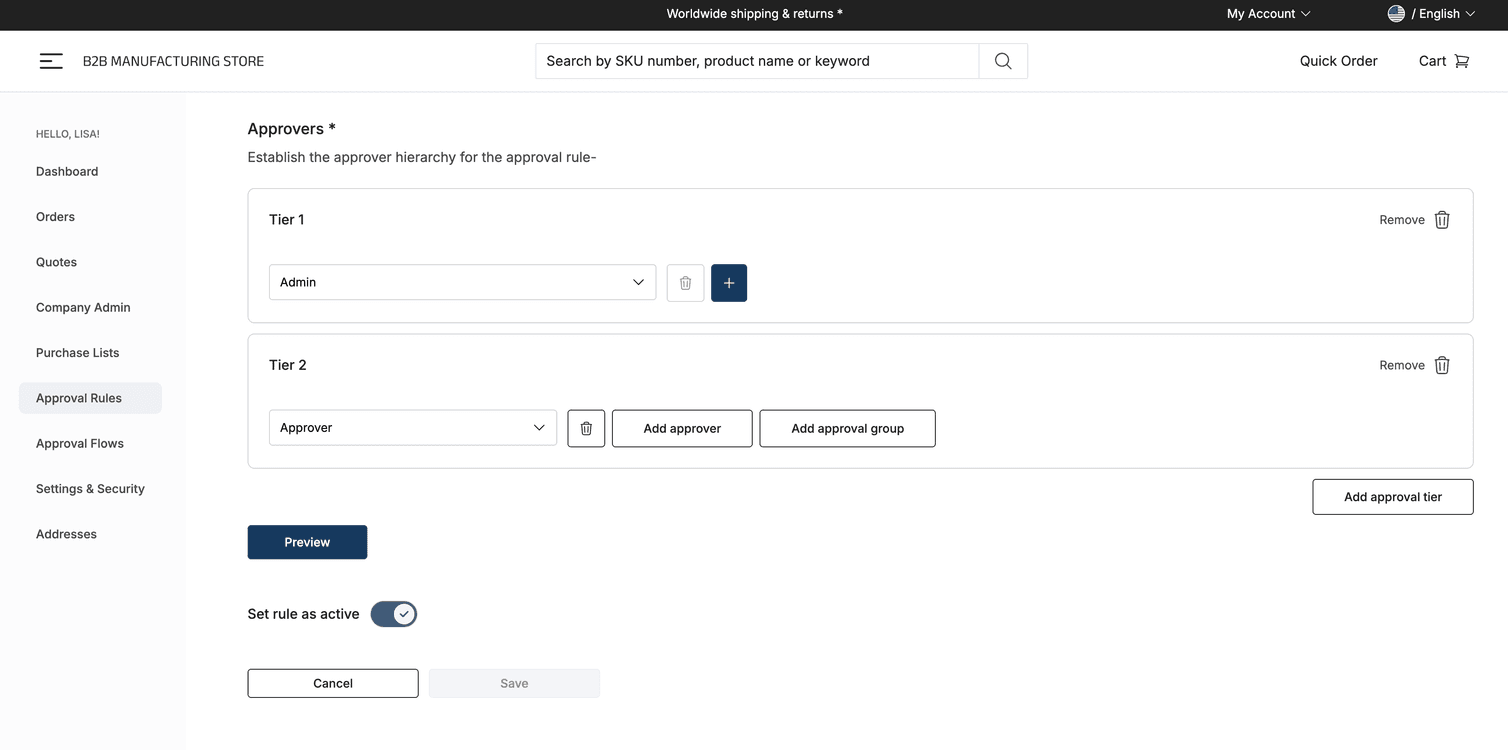
currency, country, and totalPrice predicates, but you can also add additional Order Predicates.When you create an Approval Rule, you must also set who can approve the Order. Users with admin, buyer, and approver associate roles can approve Orders. You can add up to five tiers of approvers, for more information about how tiers work, see Configure Approval Rules.
Create an Approval Rule
To create an Approval Rule, follow these steps:
- In the My Account menu, select Approval Rules, then click Add approval rule.
- Complete the following fields:
- Rule Name: name for the Approval Rule.
- Description: optional description for the rule.
- Requester roles: the associate roles the rule applies to.
- In Rule, click Add and define the condition that will trigger the Approval Flow, then click Add rule. To add multiple conditions, click the Add icon. To trigger the Approval Flow when all conditions are met, use the AND operator, otherwise use the OR operator.
- Optional: To add a nested condition to a rule, add a new rule using the Add icon, then click Add subgroup and define another condition.

- In Approvers, click Add, then select the associate role that must approve the Order. To add multiple Approvers to a tier, click the Add icon again and select the role.
- Optional: To require approval from multiple users, click Add approval group and select another associate role.
- To add another approval tier, click Add approval tier.
- Select whether the rule is active or inactive.
- Click Save. After you save an Approval Rule, you cannot delete it. However, you can set the rule to inactive if you don't want it to apply to incoming Order requests.
Add additional Order Predicates
By default, the launchpad offers
currency, country, and totalPrice Order Predicates. However, you can manually add additional predicates using the ApprovalRuleConfig interface. To add additional predicates, follow these steps:-
Open the
approval-rules.tsfile at this location:/src/lib/tastics/approval-rules/config/approval-rules.ts. -
In the
approvalRulesConfigobject, add the new predicate as a key-value pair, where the key is an Order Predicate and the value contains the following fields from theApprovalRuleConfiginterface:type: types supported by the interface. You can usetext,enum, andnumbertypes.name: name of the predicate.operators: operators you can use on the new predicate—for example,=or>=.values: forenumtypes only. These are the values you can use in the enum—for example, for adding a predicate for currency, the values could beUSD,EUR, andGBP.constructPredicateFromRule: returns a valid Order Predicate. You can edit what is returned to suit your needs. In the following example,totalPriceuses cents, so alongsidekeyandoperator, thevaluemultiplied by 100 is returned. This converts the cents to a whole currency unit, such as dollars.constructRuleFromPredicate: returns a valid rule based on the Order Predicate returned inconstructPredicateFromRule. This adds the new predicate to the Approval Rule builder on the user interface (UI). You can view the valid rules at this location:/src/components/organisms/rule-builder/types/index.ts.
The values you use for thename,operators[].name, andvalues[].namefields are translation keys that are passed to thetranslatefunction at/src/providers/I18n/hooks/useTranslation/index.tsto translate and display as the user's selected language on the UI.
// Adding a text type predicate
  'totalPrice.centAmount': {
    type: 'text',
    name: 'cart.cart.amount',
    operators: [
      { name: 'common.is.equal', value: '=' },
      { name: 'common.is.more.than', value: '>' },
      { name: 'common.is.more.than.or.equal', value: '>=' },
      { name: 'common.is.less.than', value: '<' },
      { name: 'common.is.less.than.or.equal', value: '<=' },
    ],
    constructPredicateFromRule(rule) {
      return `${rule.key} ${rule.operator} ${parseInt(rule.value) * 100}`;
    },
    constructRuleFromPredicate(predicate: string) {
      const [key, operator, value] = predicate.split(' ');

      return {
        key,
        operator,
        value: Math.floor(parseInt(value) / 100).toString(),
      };
    },
  },

// Adding an enum type predicate
  currency: {
    type: 'enum',
    name: 'common.currency',
    operators: [
      { name: 'common.is', value: 'is' },
      { name: 'common.is.not', value: 'is_not' },
    ],
    values: [
      { name: 'USD', value: 'USD' },
      { name: 'EUR', value: 'EUR' },
    ],
    constructPredicateFromRule(rule) {
      return `${rule.key} ${rule.operator === 'is' ? '=' : '!='} "${rule.value}"`;
    },
    constructRuleFromPredicate(predicate) {
      const [key, operator, value] = predicate.split(' ');

      return {
        key,
        operator: operator === '=' ? 'is' : 'is_not',
        value,
      };
    },
  },
Approval Flows
You can access Approval Flows on desktop or mobile devices.
If Orders are waiting for approval, a banner will notify the approver that there are Orders in the Approval Flows area. In this area, you can view pending, accepted, and rejected Orders.
Manage Orders
To review an Order, follow these steps:
- In the My Account menu, click Approval Flows.
- On the relevant Order, click View.
- Review the Order details and click either Approve or Reject. If you reject an Order, you can add a note to explain why.