Learn how to manage your Product catalog in a Project.
The Product list displays all Products that exist in your Project and lets you do the following:
- add and remove Products within your Project
- view and edit Product details
- publish and unpublish Products to manage their visibility in your stores
- export your current Product list to make it transferable between Organizations and Projects and import it back
- search through your Products using the powerful search and filters in the view
Create a Product
-
Go to Products > Add product.
-
Select a Product type from the list of Product types created in your Project.Product Types created from your Smart Data Modeler proposal appear in this list after you import the proposal in Smart Data Modeler.
-
Click Next.
-
Enter the details for the Product.
- For Product name, enter localized names for the Product.
- For Product description, enter localized descriptions for the Product.
- For Product key, enter a unique identifier value for the Product.
- For Product categories, select the Categories for the Product. If the Recommended categories setting is enabled for your Project, Categories will be generated upon creating the Product.
- For Product price mode, select the type of Price to be used for the Product at checkout.
- For Tax category, select the Tax Category for the Product.
-
Enter custom attributes configured for your Project. Fill in at least one locale configured for your Organization.
-
Click Next.
-
Click Add variant to add Product Variants for the Product.
- Optional: For SKU, enter a SKU value for the Product Variant.
- Optional: For Variant key, enter a unique identifier value for the Product Variant.
- Enter the details for the Attributes.
- Click Save.
Treat theskuvalues as immutable identifiers. Finalize SKU naming before assigning Products to Product Selections to avoid background reconciliation and data migration work. -
Click Next.
-
Enter localized keywords for your internal storefront search.
-
Add external search information for search engine optimization (SEO).
- For URL slug, enter localized slugs for the Product to be used by external search engines.
- Optional: For Meta title, enter localized meta titles for the Product to be used by external search engines. To use the same names for the Product, as defined earlier, click Use localized product name.
- Optional: For Meta description, enter localized descriptions for the Product to be used by external search engines. To use the same descriptions for the Product, as defined earlier, click Use localized product description.
-
As a rule, first Product Variant created is automatically set to the master Product Variant. Click the Set to master button on the desired Product Variant page to promote a Product Variant to master.
-
Click Save.
You can now add images, Prices, Inventory, and store-based tailored data for the Product.
Add images
- Go to Products > Product list.
- Select a Product and click the Variants tab.
- Select a Product Variant and click the Images tab.
- Click Add image and upload an image of your Product Variant.
- Close the Product Variant pane to save your changes.
Merchant Center supports only .jpg, .png, and .gif image formats. The maximum file size is 10 MB per image. Image filenames must not contain spaces.
Add Prices
- Select a Product Variant and click the Prices tab.
- Click Add embedded price and enter the price information.
- Optional: For Price key, enter a unique identifier value for the Embedded Price.
- For Price, select the currency and enter the money value.
- Optional: You can add additional constraints for your Embedded Price.
- Optional: To make the Embedded Price available only to Customers in a specific location, select a country from the Country drop-down.
- Optional: To make the Embedded Price available only to a specific group of Customers, select a Customer Group from the Customer group drop-down.
- Optional: To make the Embedded Price available only for Products sold through a specific Channel, select a Channel from the Channel drop-down.
- Optional: To make the Embedded Price available for a specific time period, select the dates and time for Price valid from and Price valid to.
- If present, select a Custom Field for the Price and enter a value for it.
- To save your changes, click Save and then close the Product Variant pane.
Add Inventory
- Select a Product Variant and click the Inventory tab.
- Click Add inventory and enter the Inventory details.
- Optional: For Channel, select a Channel; each Channel can be assigned to an Inventory only once.
- For Quantity, enter the total stock units available for the Product Variant.
- Optional: For Average restock period (days), enter the number of days it takes to restock the Product Variant.
- Optional: For Expected delivery, enter the expected date and time of restock of the Product Variant.
- If present, select a Custom Field for the Inventory and enter a value for it.
- To save your changes, click Save and then close the Product Variant pane.
Add tailored data for a Product
You can tailor your product information for different brands or regions based on your business requirements. This increases visibility, customer loyalty, and orders.
Tailored data is associated with a Product via the Product's key. Deleting a Product, or changing the Product key, will delete all associated tailored data.
To add tailored data for a Product, do the following:
- Go to Products > Product list and select a Product.
- On the Product details page, select a Store from the drop-down.
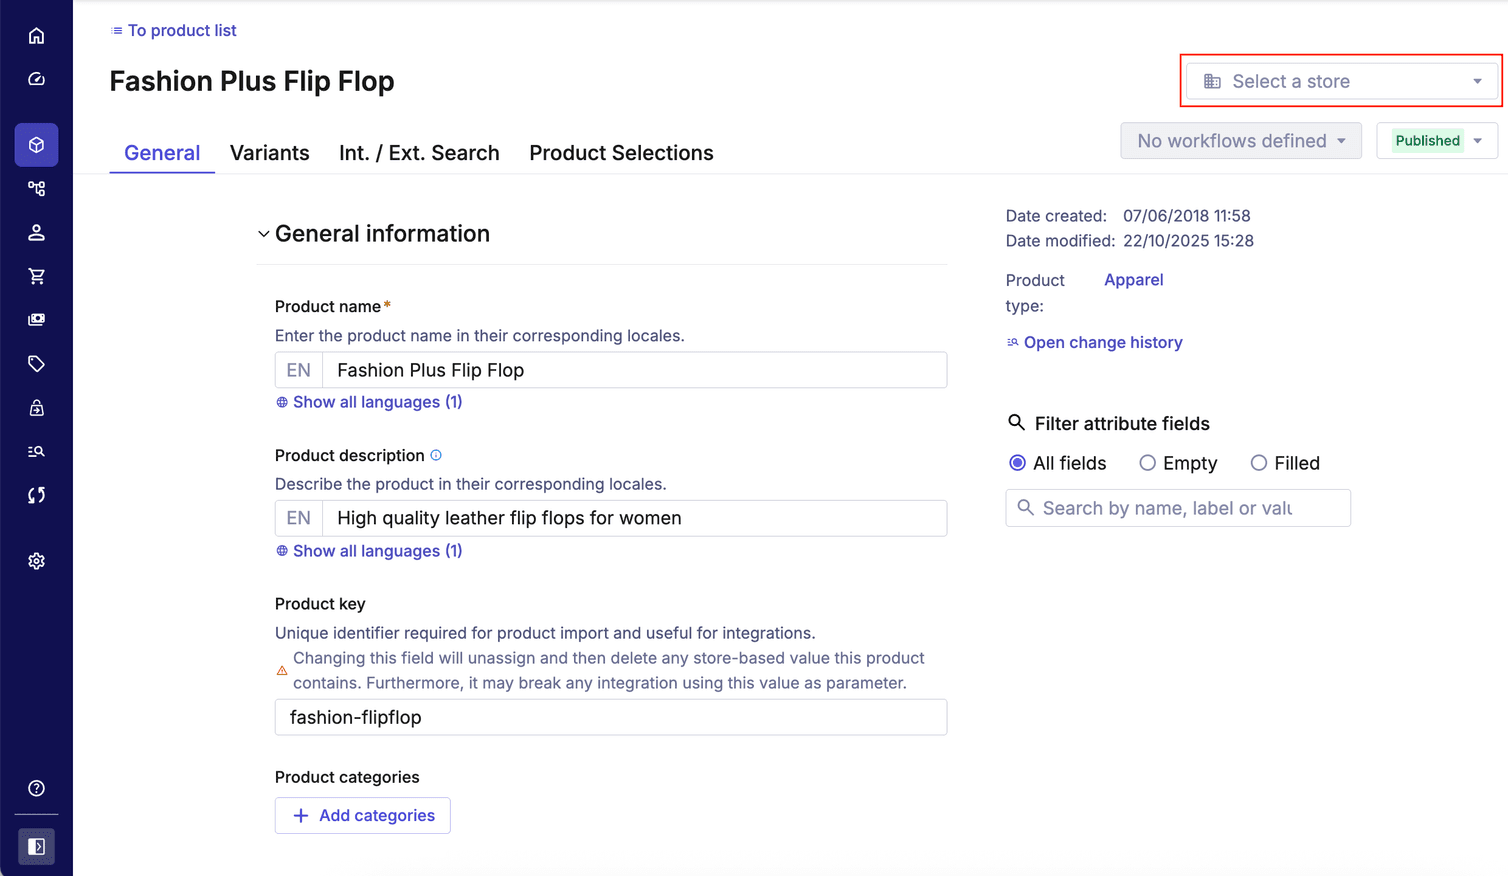
- Enter the tailored values for Product name, Product description, Key for tailored data, and any Product Attributes.
All tailored fields are optional. Fields left empty fall back to the default Product data when published.
- Click Save tailored values in store.
- To tailor meta information for the Product, click the Int. / Ext. Search tab, enter the tailored values for URL slug, Meta title, and Meta description.
- Click Save.
To add tailored data for a Product Variant, do the following:
- Go to Products > Product list and select a Product.
- Click the Variants tab and select a Product Variant.
- Select a Store from the drop-down.
- To tailor Attributes, enter the tailored values for the Attributes and click Save tailored values in store.
- To tailor images, click the Images tab and click Add image by URL. Upload an image and click Save tailored values in store.
After saving your tailored Product Projection, you can manage the visibility of tailored values.
Publish tailored data
- Go to Products > Product list and select a Product.
- To publish the tailored data, select store-based values. If fallback values is selected, the default (original) Product data is available for the Product (Variant) on your storefront.

The following diagram shows how store-based tailored values relate to and fall back to the underlying Product and Variant data.

Manage Products
You can perform the same action on multiple Products simultaneously or export a selection of Products from the Product list. For example, this can be useful in conjunction with the search feature to publish all the Products in a specific campaign or sale.
- Publish: publishes the selected Products.
- Unpublish: unpublishes the selected Products.
- Delete: deletes the selected Products.
- Bulk edit Attributes: updates in bulk the Product Attributes and Variant Attributes (that have the SameForAll constraint) of one or more selected Products.
- Bulk edit Categories: updates the selected Product's Categories in bulk.
- Bulk assign Products to Product Selections: assigns Products to Product Selections in bulk.
To select Products on different pages, you can pin up to 20 Products to the top of the table; it allows you to navigate through other pages of the Product list.
Reorder Attributes
To reorder Attributes, do the following:
- Go to Products > Product list.
- Select a Product from the Product details page.
- In the Product Attributes section, click Reorder and drag the Attribute fields accordingly. You can reorder fields only if no filter is applied for the Attribute fields.
- Click Save.
- In the Update your attribute order dialog, select if you want to save the field order only for the selected Product or for all Products of the respective Product Type, and then click Confirm.
Review modified Products

You can edit, revert, or publish your changes.
- To revert or publish all changes on the page, click Revert all or Publish all and confirm the action.
- To revert or publish all changes to a single Product, click Revert or Publish. If one or more fields are edited or reverted, save your changes before reverting or publishing the changes.
- To revert individual changes, click Revert to published.
- Go to Project Settings.
- Open the Miscellaneous tab.
- Enable the Reduce page size in “Review modified products” view toggle.
- Visit the Review modified products page and select one of the reduced page size options.
Manage Products in Categories
After this, proceed to editing Products in Categories:
- Go to Products > Product list.
- Select the Products and, in the Actions drop-down menu, select Bulk edit categories.
- Select Categories to add or remove and click Next.
- On the confirmation dialog, confirm the action.
Search for Products
< >).To search for Products, you must index your Product list in your Project. The indexing time can vary depending on the size of the Product list.
Basic Product search
shoe, hat, SH123, or shoe hat SH123.This search method supports only prefix matching. As a result, you must specify the exact starting characters of the values in your search query.
Search by Product Attributes
You can filter your Product search by custom Product Attributes. To do this, you must first make the Product Attribute columns visible by following these steps:
- Go to Products > Product list.
- Click the Table settings icon, and then select Product columns.
- Move the required Product Attributes from the Hidden columns list to the Visible columns list.
After a Product Attribute column is visible and if that Product Attribute is searchable (indicated by a search icon), it will be displayed in the Search drop-down list. You can then refine your Product search by using the Product Attribute.
Advanced Product search
An advanced search query consists of the following top-level objects:
querydescribes the data to be searched for and filters to be applied to results.filter(optional) defines the way to filter data found viaquery.sort(optional) describes the sorting of search results.pagination(optional) describes the pagination of search results.
In the examples below, you can see complete simple queries.
Find products with a specific price:
{
  "query": {
    "and": [
      {
        "exact": {
          "field": "variants.prices.currencyCode",
          "value": "EUR"
        }
      },
      {
        "exact": {
          "field": "variants.prices.centAmount",
          "value": 2222
        }
      }
    ]
  }
}
shirtColor attribute value of Green:{
"query": {
"fullText": {
"field": "variants.attributes.shirtColor",
"value": "Green",
"attributeType": "set_text"
}
}
}
Query object
A query object consists of the following:
- A compound expression wrapper defining relations between expressions. You can use only one compound expression per query.
- A query expression defining fields and values to search across. You can use multiple different query expressions that will be combined with the compound expression.
- A set of query fields within the query expression. The
fieldandvaluefields are required, whereas the other fields are optional.
Compound expressions
Compound expression wrapper has the following options:
and: only matches Products that match all query expressions.or: matches Products that match at least one query expression.not: matches Products that don't match any query expressions.notexpressions don't work onnestedfields.notexpressions don't work onarrayfields.
currencyCode must be EUR and the centAmount must be 2222.{
"query": {
"and": [
{
"exact": {
"field": "variants.prices.currencyCode",
"value": "EUR"
}
},
{
"exact": {
"field": "variants.prices.centAmount",
"value": 2222
}
}
]
}
}
Query expressions
A query expression wraps the actual data of a query and defines how a search is conducted.
{
  "query" {
    "or": [
      "exact": { //This is a query expression
        ...
      },
      "fullText": { //This is a query expression
        ...
      }
    ]
  }
}
You can use the following types:
fullTextexactprefixrangewildcardexists
fullText
fullText query performs full-text searches of fields. Full-text searches use the fields specified in the Query body and have the option of using the mustMatch field.green or handbag in their name. Hence, Products with the name yellow handbag and green shoes match.{
"query": {
"fullText": {
"field": "name",
"language": "en",
"value": "green handbag",
"mustMatch": "any"
}
}
}
exact
exact query searches for exact values only. Exact searches use the fields specified in the Query body and have the option of using the caseInsensitive field.value field. Hence, Chiquita_yellow_123 and chiquita_YELLOW_123 match, but not chiquita_yellow_1234.{
"query": {
"exact": {
"field": "variants.sku",
"value": "chiquita_yellow_123",
"caseInsensitive": true
}
}
}
prefix
prefix query searches for values of fields that begin with the specified prefix. Prefix searches use the fields specified in the Query body and have the option of using the caseInsensitive field.commerceto. Hence, Products that begin with commerce do not match.{
"query": {
"prefix": {
"field": "variants.attributes.brand",
"attributeType": "text",
"value": "commerceto",
"caseInsensitive": true
}
}
}
range
range query only matches values between specified boundaries and works with date and number values. Range queries use the following fields:-
field- String - Required
Any DateTime field, likelastModifiedAt -
gte- DateTime - Optional
Lower bound of the range query. If omitted, the query body must have anltespecified and searches from theltedate backwards. -
lte- DateTime - Optional
Upper bound of the range query. If omitted, the query body must have agtespecified and searches from thegtedate forwards.
For example, the following query searches for Products last modified between 25 August 2019 and 26 August 2019.
{
  "query": {
    "range": {
      "field": "lastModifiedAt",
      "gte": "2019-08-25T12:00:00.000Z",
      "lte": "2019-08-26T12:00:00.000Z"
     }
  }
}
wildcard
wildcard query searches for values of fields that match the specified wildcard expression. Wildcard searches use the fields specified in the Query body and have the option of using the caseInsensitive field.value:*for one or more characters$for exactly one character.
{
  "query": {
    "wildcard": {
      "field": "name",
      "value": "ki*y"
    }
  }
}
{
  "query": {
    "wildcard": {
      "field": "name",
      "value": "kit$y",
      "caseInsensitive": true
    }
  }
}
exists
exists query searches for fields that have a non-null value. The only field required is field.{
"query": {
"exists": {
"field": "name"
}
}
}
Query body
A query expression can use the following fields in its body:
-
field- String - Required
The name of the field to search for. For more information, see Searchable fields. -
value- String - Required
The value to search for. -
language- String - Optional
An IETF language tag. Use only when searching for Product data in a specific language. -
attributeType- String - Optional
The Attribute type. Use only when thefieldspecified is a Variant Attribute (product.attribute.<attribute-name>). Allowed values are:text,set_textboolean,set_booleanltext,set_ltextenumlenumnumber,set_numbermoney,set_moneydate,set_datetime,set_timedatetime,set_datetimereference,set_reference
-
boost- Number - Optional
Makes a query expression count more towards the relevance score in relation to other query expressions. -
mustMatch- String - Optional
Use withfullTextandfuzzysearches only. It can either beanyorall.- If you use
all, and search with a value ofyellow car, the full text search matches Products that have bothyellowandcaranywhere in the searched field. - If you use
any, the full text search matches Products that haveyelloworcarin the searched field.
- If you use
-
caseInsensitive- Boolean - Optional
Use withexact,prefixandwildcardsearches only. Iftrue, the search is treated as case insensitive. For example, a case insensitive search forYellow Carmatches a field withyellow car.
Searchable fields
You can access any direct field of a Product Projection, Product Type or Attribute definition, or a sub-field of a referenced or nested object in some cases.
LocalizedString fields, which are treated differently.- a simple JSON data type, such as
idorkey. - a field on a referenced type or array of a type, such as
variants.sku, ortaxCategory.name. - a LocalizedString. If so, use the
languagefield to specify the language to be searched in. - a field on a Product Variant's Embedded Price, accessed using the format
variants.prices.currencyCode, wherecurrencyCodeis the field accessed. - a Product Variant Attribute, accessed using
variants.attributes.<attribute_name>. If so, use theattributeTypefield to specify the attribute type.
- a simple JSON data type, such as
idorkey. - a LocalizedString. If so, use the
languagefield to specify the language to search in. - Any field on an AttributeDefinition, accessed using
attributes.nameorattributes.label, wherenameandlabelare the fields being accessed.
boost field
boost field adds more importance to a query result than the others.butter in the name field are more important than those that have butter in the description field.{
"query": {
"or": [
{
"fullText": {
"field": "name",
"language": "en",
"value": "butter",
"boost": 2
}
},
{
"fullText": {
"field": "description",
"language": "en",
"value": "butter"
}
}
]
}
}
Filter object
filter section. The filter contains fullText, exact, or prefix query expressions, as described above, and filters for the field described. All sub-expressions contained in a filter are connected with and logic.
All sub-expressions of query count towards the score except for filter.{
"query": {
"and": [
{
... //query expressions here
},
{
"filter": [
{
"exact": {
"field": "categories.id",
"value": "cd2c2b6b"
}
}
]
}
]
},
Sort object
sort object after it. The sort object defines how the query is sorted and displayed in the Product List.sort object contains the following:-
field- String - Required
The name of the field to sort by. For more information, see Searchable fields. You can also use the internal fieldscore, in addition to theinternalfield set to true, to sort by the weighted score. -
order- String - Required
The sort order. Can either beasc(ascending) ordesc(descending). -
mode- String - Optional
The sort mode to use. Allowed values are:min: uses the minimum of all available values.max: uses the maximum of all available values.avg: uses the average of all available values.sum: uses the sum of all available values.
-
attributeType- String - Optional
The attribute type. Use only when thefieldis a Product Attribute. -
internal- Boolean - Optional
Set this totruewhenfieldis set toscore.
{
  "query": {
      ...
  },
  "sort": {
    "field": "name",
    "order": "desc"
  }
}
Pagination object
A query can have the optional pagination information that includes the following fields:
-
limit- Number - Required
Set the upper limit of items to return. -
offset- Number - Required
Set the offset from which the query is evaluated.
Import and export
Import Products
To import Products into the Merchant Center, do the following:
-
Go to Products > Product list.
-
Click the Actions drop-down and select Import products.
-
In the Import products by CSV window, choose a CSV file on your computer to upload, and click Upload and preview.
- Select the Publish all products in the file checkbox to update the current and staged representation of existing Products, and publish new Products. If not selected, the imported data will only update the staged representation of existing Products and new Products created by the import process are not published.
-
After the file is uploaded and validated, verify the rows and columns to be imported, and click Continue.
-
Click Start import to confirm the import process. As the import process is a background task, you do not need to wait for it to complete. To check the import status, go to Operations > Import.
Import Inventory
- Go to Products > Product list.
- Click the Actions drop-down and select Import inventories.
- In the Import inventories by CSV window, choose a CSV file on your computer to upload, and click Upload and preview.
- After the file is uploaded and validated, verify the rows and columns to be imported, and click Continue.
- Click Start import to confirm the import process. As the import process is a background task, you do not need to wait for it to complete. To check the import status, go to Operations > Import.
Export Products or Inventory
Bulk unpublish via CSV import
- Go to Products > Product list.
- Click the Actions drop-down and select Bulk unpublish via CSV.
- In the Bulk unpublish via CSV window, choose a CSV file on your computer to upload, and click Upload and preview.
- After the file is uploaded and validated, verify the number of Products to be unpublished, and click Continue.
- Click Start bulk unpublish to confirm the import process. As the import process is a background task, you do not need to wait for it to complete. To check the import status, go to Operations > Import.
Bulk delete via CSV import
This action cannot be undone. After you delete a Product, you cannot recover it.
- Go to Products > Product list.
- Click the Actions drop-down and select Bulk delete via CSV.
- In the Bulk delete via CSV window, choose a CSV file on your computer to upload, and click Upload and preview.
- After the file is uploaded and validated, verify the number of Products to be deleted, and click Continue.
- Click Start bulk delete to confirm the import process. As the import process is a background task, you do not need to wait for it to complete. To check the import status, go to Operations > Import.